Widget Anatomy
RiotJS
shuffleboard2js allows you to build custom tags using the RiotJS library. To start learning about how you can create your own custom widgets it’s recommended you read RiotJS’s guide here.
Setting accepted types when registering your widget
The value of the acceptedTypes configuration property passed into the dashboard.registerWidget function determines what NetworkTables sources can be dragged onto the widget.
dashboard.registerWidget('widget-id', {
  acceptedTypes: ['string'],
  ...
  ...
  ...
});
In the code above the acceptedTypes property is passed an array with the element ‘string’. This means that only NetworkTables keys with value type string can be dragged onto the widget.
There are two kinds of widget types that can be passed into the acceptedTypes property: The primitive NetworkTable types that each individual NetworkTable key has, and types determined by keys that end in .type.
This is the list of primitive types acceptedTypes can be passed:
- string
- number
- boolean
- array
Here are some examples of types of the .type kind:
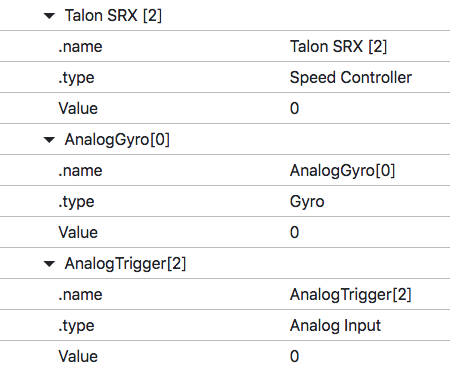
- Speed Controller
- Gyro
- Analog Input
- Digital Input
- Double Solenoid
Getting NetworkTables data in your widget code
NetworkTables data is accessible from your widget code through opts.table:
<your-widget-id>
  <p>NetworkTables data: {opts.table}</p>

  <script>
    this.on('update', () => {
      console.log('Networktables data updated:', this.opts.table);
    });
  </script>
</your-widget-id>
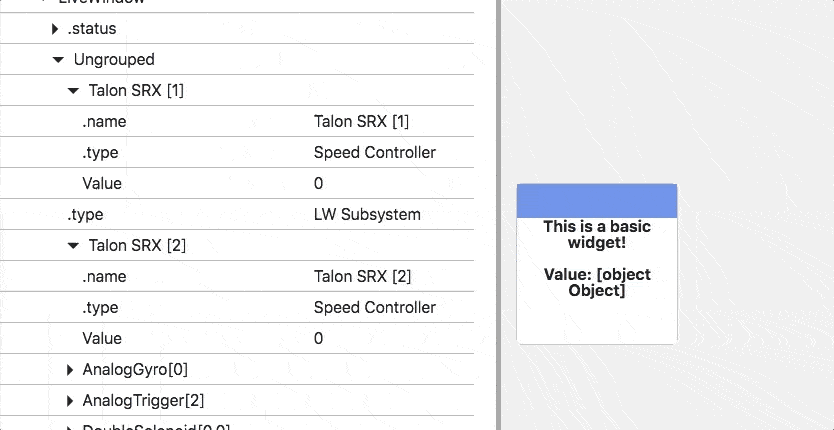
For example, the basic-widget we created in the last section, which accepts NetworkTable values of type string, will show whatever NetworkTables value of type string is dragged onto the widget:
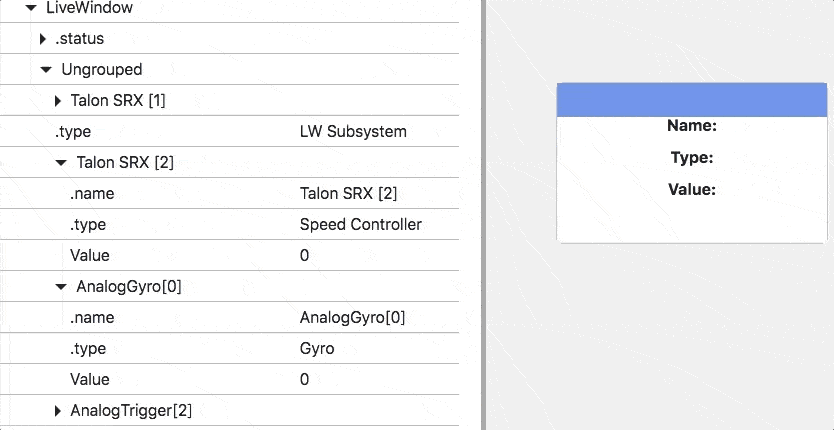
If the widget’s accepted types that are determined by the .type key, then opts.table will be an object containing all the keys in the subtable dragged onto the widget. For example, take the following widget that accepts types Gyro and Speed Controller:
<basic-widget>
  <p>Name: {opts.table['.name']}</p>
  <p>Type: {opts.table['.type']}</p>
  <p>Value: {opts.table['Value']}</p>
</basic-widget>
Updating the widget
Widgets are updated automatically when any NetworkTables values change. To update manually call this.update().
<your-widget-id>

  <!-- Widget HTML goes here -->

  <script>
    this.update();
  </script>

</your-widget-id>
Styling your widget
To style your widget add a <style></style> tag:
<your-widget-id>

  <!-- Widget HTML goes here -->

  <style>
    /* CSS goes here */
  </style>

</your-widget-id>
Adding a <script></script>
Scripts can be added to your tag by adding a <script></script> tag:
<your-widget-id>

  <!-- Widget HTML goes here -->

  <script>
    // Your code goes here
  </script>

</your-widget-id>
Adding properties
Getting properties
On properties update
If you want to receive updates when the widget’s properties are updated, use the propertiesUpdate event:
<your-widget-id>

  <!-- Widget HTML goes here -->

  <script>

    this.on('update', () => {
      // update event is fired when properties change
    });

    this.on('propertiesUpdate', () => {
      // propertiesUpdate event is also fired, if you want to run code specifically
      // when the the widget's properties change
  });
  </script>

</your-widget-id>
Properties modal
Other Events
If you want to receive updates when the widget is resized, use the resize event:
<your-widget-id>

  <!-- Widget HTML goes here -->

  <script>
    this.on('resize', () => {
      // code goes here
    });
  </script>

</your-widget-id>